How to Sharpen a Knife With a Whetstone
The short answer. Sharpen on a 1000 grit stone at a steady angle (about 15° per side for Japanese knives, 20° for German ones) until you can feel a small burr along the whole edge, then repeat on the other side. Refine the edge on a 3000–6000 grit stone, then strop lightly to remove what's left of the burr.

On this page 10 sections
What you need
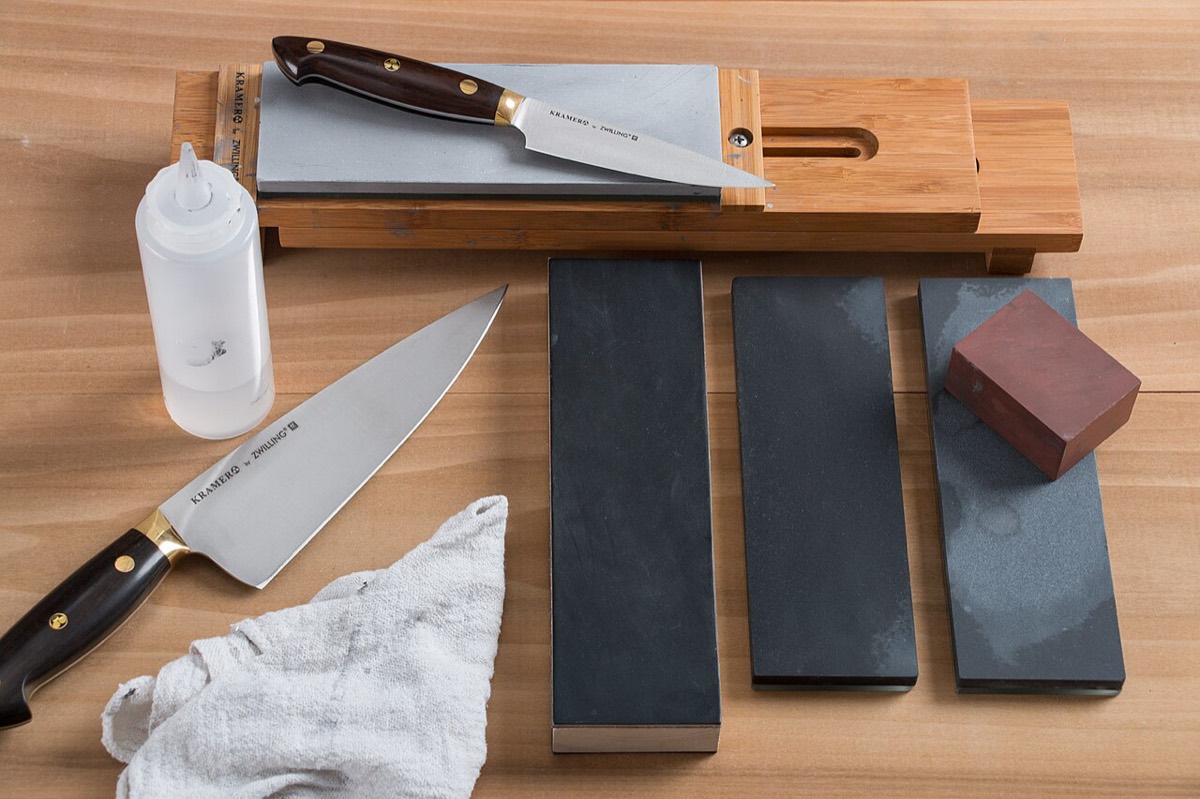
To sharpen a kitchen knife with a whetstone you need a medium stone (around 1000 grit), ideally a finer one (3000–6000), something to stop the stone sliding, water, and a permanent marker. A combination stone with 1000 on one side and 6000 on the other covers both grits in one purchase.
- A whetstone. A 1000/6000 combination stone is the usual starting point.
- A base. A rubber stone holder, a damp kitchen towel or a silicone mat. The stone must not move while you work.
- Water. A container big enough to soak the stone if it's a soaking stone, or a spray bottle for a splash-and-go stone.
- A permanent marker. Coloring the edge bevel shows exactly where the stone is removing steel. This is the single best trick for beginners.
- Optional: a clip-on angle guide, a leather strop (newspaper or plain cardboard works too), and a flattening plate for later.

How to use a whetstone, step by step
The whole method is: keep the stone wet, hold a constant angle, grind one side until a burr forms along the full edge, do the same on the other side, then refine on a finer grit and remove the burr. Seven steps, and the burr in step 4 is the part that tells you when to move on.
-
Soak or splash the stone
Check what kind of stone you have. A soaking stone (many budget combination stones, including the King 1000/6000) goes into water for about 10–15 minutes, until it stops releasing bubbles. A splash-and-go stone only needs its surface wetted; leaving some of them in water for long periods can make them crack or soften. Follow the maker's instructions.
Set the stone on its holder or towel, coarse side up, with the long side running away from you. Keep water nearby and re-wet the surface whenever it starts to look dry. The gray slurry that builds up while you sharpen helps, so don't wash it off between strokes.
-
Find and hold the angle
Most Japanese double-bevel knives are sharpened at about 12–15° per side; most German knives at about 20°. You don't need a protractor: the angle depends on how high you lift the spine off the stone, and that height depends on how tall your blade is. Pick your knife below to see the height.
Sharpening angle tool
Lift the spine 12.2 mm off the stone
About 7 stacked US quarters.
Show the working
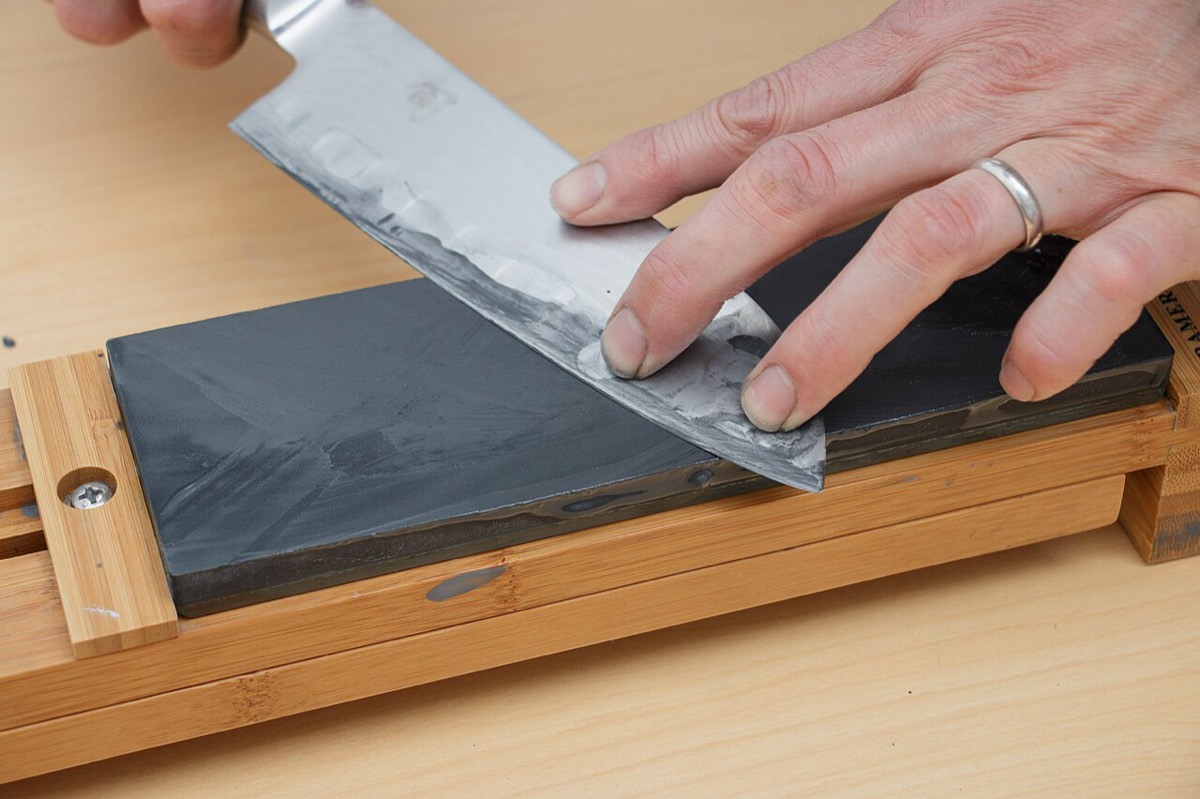
Hold the handle in your dominant hand with your index finger on the spine or your thumb on the flat of the blade near the heel. Put two or three fingertips of your other hand on the blade, just above the edge, where you're grinding. Those fingers apply the pressure; the hand on the handle holds the angle.
Now the marker trick: color the whole edge bevel with a permanent marker and take two light strokes. If the ink is gone along the very edge but not higher up, lower the spine. If it's gone higher up but still on the edge, lift the spine a little. When the ink comes off evenly across the bevel, you've matched the angle. For more on choosing an angle, see the sharpening angle guide.
-
Stroke the edge across the stone
Work the edge in sections: heel, middle and tip, each about 3–5 cm long. Push the blade forward across the stone (edge leading) and pull it back (edge trailing), keeping the angle the same in both directions. Apply light-to-moderate pressure on the push or on the pull, not both, and keep the whole length of the stone in use so it wears evenly.
Edge-trailing strokes (pulling the edge away behind the spine) are the safer choice for beginners because there is no risk of digging the edge into the stone. Edge-leading strokes cut a little faster. Either works; consistency matters more than direction. For the curved tip, lift the handle slightly as you reach it so that the part of the edge touching the stone stays at the same angle.
-
Feel for the burr
A burr is a thin lip of steel that folds over to the opposite side of the edge once the two bevels meet. It is the only reliable sign that you've ground all the way to the edge. Without it, you're polishing a dull edge.
To check, run your thumb gently from the spine across and off the edge on the side facing up, never along the edge. On the side you've been grinding you feel nothing; on the opposite side you feel a slight catch, like a fine hook. Check every section from heel to tip. Keep working any section that has no burr yet. On a dull knife this can take anywhere from a few minutes to much longer, depending on the steel and how dull it is.
-
Switch sides and repeat
Turn the knife over and sharpen the second side at the same angle, section by section, until the burr flips back to the first side along the whole edge. This usually takes fewer strokes than the first side because you're only matching the bevel you've already made.
Then make the burr smaller: alternate sides with fewer, lighter strokes each time, for example ten per side, then five, then three, then single alternating strokes. Each round shrinks the burr.
-
Move to the finer grit
Rinse the knife and the stone to wash off coarse grit, then flip a combination stone to its fine side (or switch to your 3000–6000 stone). Repeat steps 3 to 5 with lighter pressure. The fine stone removes the scratches the 1000 grit left, makes the burr smaller still and leaves an edge that cuts more cleanly and lasts longer.
You'll feel less burr on a fine stone, and that's normal. Finish with a few single, very light alternating strokes per side.
-
Strop and test the edge
Stropping removes what's left of the burr. Drag the blade, edge trailing only, across a leather strop, a sheet of newspaper on a flat surface or a piece of plain cardboard, at the same angle or a hair higher. Five to ten light strokes per side, alternating, is enough. Never push the edge forward into a strop: it will cut it.
Test by slicing a sheet of printer paper held by one corner. A sharp edge cuts it cleanly with little pressure; a section that snags or tears still has a burr or wasn't fully sharpened. A ripe tomato is another good test: the edge should bite into the skin with no downward pressure. Wash and dry the knife before you use it.
Which grit, and which side of the whetstone first?
Always start on the coarser side. On a 1000/6000 combination stone that means 1000 first to set the edge, then 6000 to refine it. Use a coarse stone (120–400) only if the knife is chipped. As for which side of the knife to start on, it doesn't matter for a double-bevel knife, as long as you raise a burr before you switch.
| Grit | Stone | What it does | Do you need it? |
|---|---|---|---|
| 220–400 | Coarse (repair) | Fix chips, reshape a broken tip, thin a thick edge. Removes steel fast. | Only if your knife is chipped or very damaged. |
| 800–1500 | Medium (sharpening) | Sets a new edge on a dull knife. This is the stone that does most of the work. | Yes. Start here: a 1000 grit stone. |
| 3000–6000 | Fine (refining) | Polishes the edge left by the medium stone so it cuts cleanly and lasts longer. | Recommended. A 1000/6000 combination stone covers both. |
| 8000+ | Finishing (polishing) | Mirror polish for push-cutting and slicing raw fish. Small gains for most home cooks. | Optional. |
Most right-handed people find it easier to start with the side that faces away from them when the knife is held in the right hand, but that's habit, not a rule. Single-bevel knives are different: you sharpen the beveled side first and do most of the work there (see below). If you're not sure which grit your knife needs right now, the grit chooser asks about its condition and gives you a sequence.
Sharpening Japanese single-bevel knives
Traditional yanagiba, deba and usuba knives are ground on one side only, with a flat or slightly hollow back. You sharpen the bevel side with the whole bevel flat on the stone, then remove the burr with a few light strokes on the back held perfectly flat. Never put an angled bevel on the back.
The technique, the left-handed versions and how to keep the hollow back intact are covered step by step in how to sharpen Japanese knives. If you're not sure whether your knife is single or double bevel, look at the bevel comparison.
Mistakes that ruin an edge
Most failed sharpening comes from four things: an angle that wobbles from stroke to stroke, pressing too hard, moving on before the burr has formed along the whole edge, and using a stone that has worn hollow in the middle. Each one is easy to fix once you know to look for it.
- Rocking the angle. Lifting and dropping your wrist during each stroke rounds the edge. Lock your wrist, move from the shoulder and check with the marker trick.
- Too much pressure. Hard Japanese steel chips under force, and heavy pressure makes a big burr that's hard to remove. Use light, even pressure, just enough to feel the stone bite, and less again on the fine stone.
- Skipping the burr. If you switch sides on a schedule ("20 strokes each") rather than by feel, parts of the edge never get sharpened.
- Grinding the tip and heel unevenly. The middle of the edge gets the most strokes by accident, which creates a dip (a "smile") over time. Give the heel and tip the same attention.
- Sharpening on a dished stone. See the next section.
How to flatten a dished whetstone
Whetstones wear faster in the middle, so they slowly become concave, or dished. A dished stone rounds your edge and makes a steady angle impossible. Flatten it every few sharpening sessions: draw a pencil grid on the wet surface, rub it on a flattening plate until the grid is gone, then rinse.
- Wet the stone the way you would for sharpening.
- Draw a grid of pencil lines across the whole surface.
- Rub the stone on a diamond flattening plate, or on coarse wet-and-dry sandpaper (about 120–220 grit) taped to a sheet of glass or a flat tile, using figure-eight strokes with even pressure.
- When the pencil lines have disappeared everywhere, the stone is flat. Rinse off all the loose grit, which will scratch your next edge if left behind.
- Run the plate or sandpaper at an angle along each edge of the stone to bevel (chamfer) it slightly, so the sharp corners don't chip or catch the blade.
A quick pass after every session or two takes less than a minute. Leaving it for months turns flattening into a long job.
Honing vs sharpening
Sharpening removes steel to make a new edge. Honing doesn't remove much steel: it pushes a slightly bent edge back into line. You sharpen on a whetstone every few weeks or months; you can hone or strop between sharpenings to keep the edge cutting well for longer.
The ribbed steel rod sold with many German knife sets is a poor match for hard Japanese knives: the edge is thin and less ductile, so it tends to chip rather than bend back. If you want to hone a Japanese knife, use a smooth or fine ceramic rod with very light pressure at the sharpening angle, or simply strop it on leather or newspaper as in step 7. When honing no longer brings the edge back, it's time for the stones.
How often should you sharpen your knives?
Sharpen when honing or stropping no longer brings the edge back, not on a fixed calendar. As a rough guide, a home cook using one main knife every day needs a whetstone session every one to three months, with touch-ups on the fine stone or a strop in between. Light use stretches that out.
| How you use the knife | Strop or touch up | Full sharpening (1000, then fine) |
|---|---|---|
| Daily, main knife | Weekly, or when it starts to slip on tomato skin | Every 1–3 months |
| A few times a week | Every few weeks | Every 3–6 months |
| Occasional or specialist knife | Before use if needed | Once or twice a year |
| Chipped or broken tip | Not enough | Now, starting with a coarse stone |
Signs it's time: the knife slides on tomato or pepper skin instead of biting, onions crunch and tear, or you find yourself pressing harder. A cutting board that's too hard (glass, stone, ceramic) dulls an edge much faster than wood or soft plastic, whatever you do on the stone.
Whetstone vs pull-through vs electric sharpener
A whetstone takes practice but gives you control over the angle and works on every knife, including thin Japanese and single-bevel blades. Pull-through and electric sharpeners are fast and need no skill, but most grind at a fixed, often wider angle and take off more steel than they need to.
| Whetstone | Pull-through | Electric | |
|---|---|---|---|
| Angle | Any angle you hold | Fixed by the slots | Fixed by the guides |
| Learning curve | A few sessions to get consistent | None | Little |
| Time per knife | About 10–30 minutes | Under a minute | A few minutes |
| Steel removed | Only what you choose | Can be aggressive, uneven | Can be a lot, fast |
| Hard Japanese steel | Suits it | Risk of chips and micro-tears | Only models made for 15° edges |
| Single-bevel knives | Yes | No | No |
| Edge quality | Best, if done well | Usable, rough | Good on some models |
If you own one inexpensive German-style knife and never want to think about it, a pull-through is better than a dull knife. If you've paid for a Japanese knife, a whetstone is the tool it was designed for.
Whetstone questions
Is a whetstone better than a knife sharpener?
For Japanese knives, yes. You choose the angle, remove only as much steel as you need and can sharpen single-bevel blades. A sharpener is faster and easier, which can make it the right choice for cheap, soft-steel knives.
Can you over-sharpen a knife?
You can't make an edge "too sharp", but you can waste steel by grinding long after the burr has formed, or by sharpening a knife that only needed stropping. Over years, that shortens the life of the blade and can thin it near the heel.
What grit should a beginner start with?
A 1000 grit stone. It's fine enough to give a usable edge and coarse enough to sharpen a dull knife in reasonable time. Add a 3000–6000 stone (or buy a 1000/6000 combination) to refine the edge.
Do you use water or oil on a whetstone?
Japanese water stones use water only. Oil stones (Arkansas stones and some India stones) use honing oil. Never put oil on a water stone: it clogs the surface.
Do you push or pull on a whetstone?
Both work. Many people sharpen with pressure on the push (edge leading) and a light return, others the reverse. Beginners often find edge-trailing strokes safer. Strop with edge-trailing strokes only.
How long should it take to sharpen a knife on a whetstone?
Expect about 10–30 minutes for a dull kitchen knife once you have the hang of it, longer on your first few tries or with a hard, very dull blade. A touch-up on a fine stone takes a few minutes.