How to Sharpen Japanese Knives
The short answer. Sharpen Japanese knives on whetstones, at a lower angle than German knives: about 12–15° per side for double-bevel blades. Single-bevel knives such as the yanagiba and deba are sharpened almost entirely on the beveled side, with the bevel laid flat on the stone, and only lightly on the flat back.

On this page 8 sections
How Japanese and German edges differ
Japanese knives are usually made from harder steel and ground thinner, so they're sharpened at a more acute angle: roughly 12–15° per side, compared with about 20° for most German knives. Harder steel holds that finer edge longer, but it is also more brittle, which changes how you should sharpen it.
That hardness is why the usual advice for German knives doesn't carry over. A thick, softer German edge bends when it dulls and can be pushed back into line on a ribbed steel. A thin, hard Japanese edge is more likely to chip than bend. Sharpening it means removing a small amount of steel gently and evenly, on a flat stone, at a steady low angle.
| Japanese (typical) | German (typical) | |
|---|---|---|
| Angle per side | About 12–15° | About 20° |
| Steel | Harder, more brittle | Softer, tougher |
| Behind-the-edge thickness | Thin | Thicker |
| When it dulls | Wears or chips | Rolls or bends |
| Best maintenance | Whetstone, strop, fine ceramic rod | Steel rod, whetstone or sharpener |
Exact angles vary by maker and knife, and some makers grind asymmetric edges (for example more on the right side than the left). If you know the factory angle, match it. If not, 15° per side is a safe default for a double-bevel Japanese knife. The angle tool turns that angle into a spine height for your blade.
Sharpening double-bevel Japanese knives
Gyuto, santoku, nakiri, bunka and petty knives are almost always double bevel, so you sharpen them the same way as any kitchen knife: on a whetstone, both sides, raising a burr on each before refining. The differences are a lower angle, lighter pressure and a little more care at the tip.
Follow the seven steps in how to sharpen a knife with a whetstone, with these adjustments for Japanese blades:
- Lower the spine. At 15°, the spine of a 47 mm-tall gyuto sits roughly 12 mm off the stone. Check with the marker trick before you commit.
- Go light. Hard steel cuts quickly on a good stone and forms a fine burr. Heavy pressure makes a bigger burr and risks chips.
- Refine further. A 1000 grit edge works, but hard steel takes and holds a finer finish well. Most people go to 3000–6000; see the grit guide.
- Mind the asymmetry. If your knife has an asymmetric edge, keep the same ratio: a few more strokes on the main side.
Not sure which knives you own are single or double bevel? The bevel section of our knife types guide shows the cross-sections.
How to sharpen a single-bevel knife
To sharpen a single-bevel knife, lay the wide bevel flat on the stone so both the edge and the bevel's upper line touch it, and grind until a burr forms on the flat back. Then lay the back completely flat on the stone and take a few light strokes to remove the burr. Most of the work happens on the bevel side.
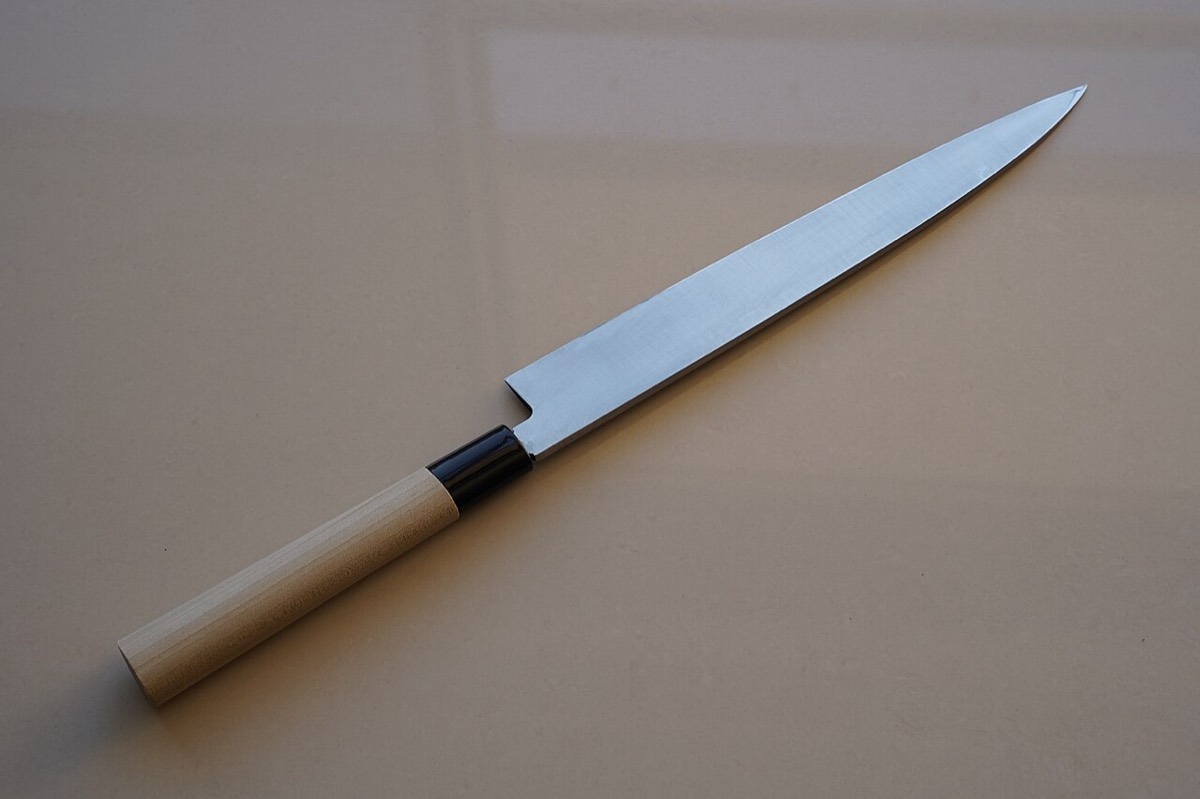
The yanagiba, deba and usuba have one wide bevel on the front (the omote) and a flat back with a shallow hollow ground into it (the ura). That hollow is what lets the back sit flat and release food cleanly. It's easy to destroy with careless sharpening, so the method protects it.
-
Find the bevel angle by feel
You don't pick an angle on a single-bevel knife: the bevel already is the angle. Lay the bevel on the stone and rock the blade very slightly until you feel it settle flat, with contact at both the edge and the shinogi line (the ridge where the bevel meets the flat of the blade). That's the position to hold.
-
Sharpen the bevel side in sections
Press with your fingertips near the edge, not the spine, and work the blade in sections from heel to tip with the bevel kept flat. On a long yanagiba that might be four or five sections. Keep the pressure on the edge side so you don't round the shinogi line.
-
Check for the burr on the back
Feel the flat back with your thumb, moving from the spine toward the edge. When there's a fine burr along the full length, the bevel side is done for this grit.
-
Flatten the back lightly
Lay the back flat on the stone, pressing with your fingers so that the edge and the narrow flat rim around the hollow both touch. Take a few light strokes, just enough to fold the burr back. Never lift the spine to put an angle on the back, and never grind the back as long as the front. The back should get a small fraction of the strokes the bevel gets.
-
Refine and repeat
Move to a finer stone and repeat: mostly bevel side, then a few flat strokes on the back, alternating with fewer strokes each time until the burr is gone. Strop both sides lightly, the back held flat.
Single-bevel knives take longer to sharpen than double-bevel ones, because the bevel is wide and you're removing steel across all of it. A flat stone matters even more here: a dished stone will round the bevel and blur the shinogi line. Flatten your stones before you start (see flattening a whetstone).
Left-handed single-bevel knives
A single-bevel knife is made for one hand. A standard yanagiba or deba has its bevel on the right side and suits right-handed cooks; a left-handed version is a mirror image, with the bevel on the left. You sharpen either one the same way, just on the opposite face, and you can't convert one into the other by sharpening.
When you sharpen a left-handed blade, the bevel is on the left face as you hold the knife, so the stroke direction feels reversed if you learned on right-handed knives. Go slowly at first and use the marker on the bevel to check that the whole face is touching. Double-bevel Japanese knives work in either hand, though some have edges ground asymmetrically for right-handers; a sharpener can rebalance those for a left-handed cook over a few sessions.
Hard steel chips: what to avoid
Hard Japanese steel is brittle, so the tools and habits that are fine on softer knives can chip it. Avoid pull-through sharpeners, coarse or fast grinding wheels, ribbed steel rods, heavy pressure and twisting the blade in food. Use whetstones and a flat, gentle approach, and cut on wood or soft plastic boards.
- Pull-through sharpeners use fixed slots, often at a wider angle than a Japanese edge, and the hard wheels or carbide blades can tear small chips out of hard steel.
- Coarse grinding wheels and dry belt grinders remove steel quickly and generate heat. Heat can soften a hard edge, and the speed makes it easy to take off far more steel than needed.
- Ribbed honing steels are designed to straighten softer edges. On hard steel they tend to cause micro-chips. A fine ceramic rod used very lightly, or a strop, is gentler.
- Glass, stone and ceramic boards dull and chip any edge. So does twisting the blade to pry food apart, or cutting through bone and frozen food.
If you do chip an edge, it's usually fixable: grind on a coarse stone (around 220–400 grit) until the chip is gone, then work back up through 1000 and a fine stone. Large chips or a broken tip may be a job for a professional.
Which stones for Japanese knives: splash vs soak
A Japanese knife sharpening stone setup can be as simple as one 1000/6000 combination stone. The main choice is between soaking stones, which need 10–15 minutes in water before use, and splash-and-go stones, which only need their surface wetted. Both sharpen Japanese steel well; splash-and-go stones are more convenient.
| Soaking stones | Splash-and-go stones | |
|---|---|---|
| Prep | Soak about 10–15 minutes, until bubbles stop | Wet the surface, start |
| Feel | Often softer, builds slurry quickly | Often harder, cuts fast |
| Storage | Must dry fully before storing | Dries quickly; some shouldn't be left soaking |
| Price | Often cheaper; many combination stones | Usually single grit, often more per stone |
Whichever you choose, the grits matter more than the brand: a 1000 grit stone for sharpening, a 3000–6000 for refining, and a coarse stone only if you need to repair chips. Add a flattening plate once you own more than one stone.
When to use a professional sharpening service
A professional is worth it for big repairs (a broken tip, deep chips, a badly uneven edge), for single-bevel knives you don't feel ready to sharpen, or if you'd simply rather not learn. Choose a service that sharpens Japanese knives on whetstones or water-cooled equipment, and ask about its experience with your type of knife.
Questions worth asking before you hand over a good knife:
- Do you sharpen on whetstones or a water-cooled wheel? (A dry, fast grinder is a warning sign for hard steel.)
- What angle will you use, and can you match the factory angle?
- Have you sharpened single-bevel knives before, and will you keep the back (ura) flat?
- For repairs, how much steel do you expect to remove?
Many specialist knife shops offer whetstone sharpening, and some take knives by mail. Even if you use a professional for repairs, learning to touch up the edge yourself on a fine stone or strop will keep the knife cutting well between visits.
Japanese knife sharpening questions
What angle do you sharpen a Japanese knife at?
About 12–15° per side for most double-bevel Japanese knives. Single-bevel knives are sharpened at whatever angle their bevel already has, by laying the bevel flat on the stone.
Can I use a pull-through sharpener on a Japanese knife?
It's best not to. Most pull-through sharpeners grind at a fixed, wider angle and can chip hard steel. They also can't sharpen single-bevel knives at all.
Can I sharpen a Japanese knife at 20°?
You can, and the edge will be a little more durable, but it will cut less keenly than the knife was designed to. If you keep chipping a thin edge, raising the angle slightly (to around 17–18°) is a reasonable compromise.
How do I sharpen a single bevel knife's back side?
Only lightly, and always flat. A few strokes with the back pressed flat against the stone removes the burr. Never put an angle on the back.
Do Damascus knives need special sharpening?
No. The patterned layers are cladding; the edge is the core steel in the middle. Sharpen them like any other Japanese knife. See Damascus knives for how they're made.